Psoas and piriformis muscles are both critical components of the hip joint’s structure and function. These muscles can have a profound impact on your body’s stability, posture, and movement, making it important to understand the key connection between them. In this article, we’ll take a closer look at psoas and piriformis exercises and how they can work together to improve your overall wellbeing.
Relationship between two muscles
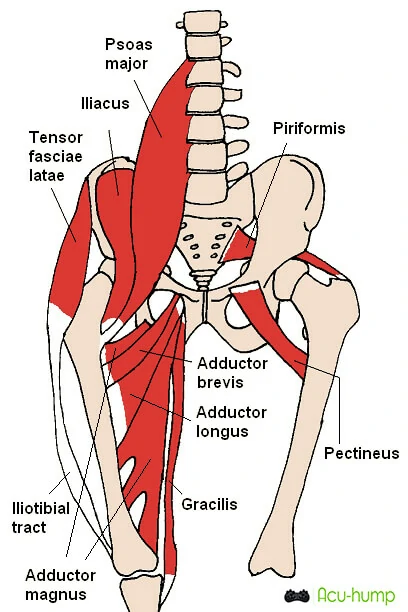
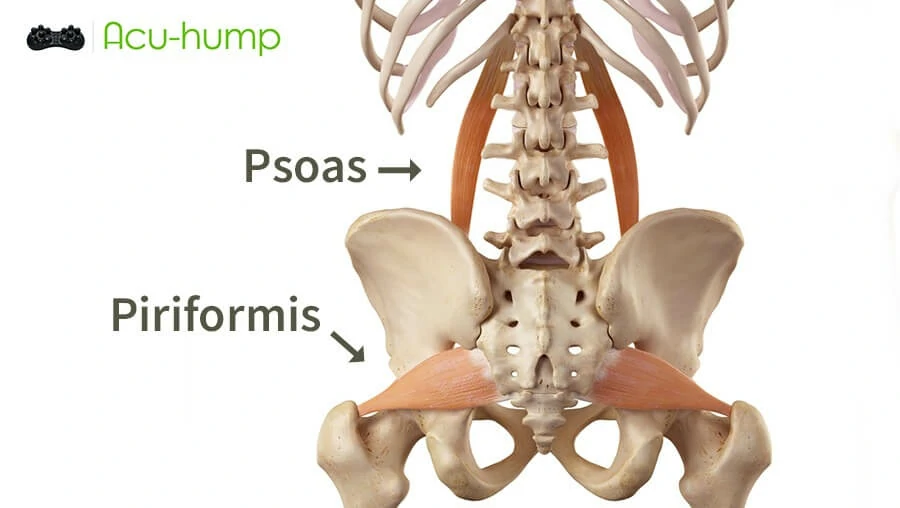
Psoas muscles are deep hip flexor muscles that connect the lumbar spine to the femur. These muscles are responsible for flexing the hip and providing stability to the pelvis during movement.
The psoas muscles work together with the piriformis muscles to facilitate movement of the hip joint. Piriformis muscles are located in the buttock region. They stabilize the hip joint during movement and contribute to the external rotation of the hip.
Psoas and piriformis exercises can help improve your body’s stability and reduce the risk of injury. Exercise programs for these muscles can be done separately or together. A comprehensive exercise routine that includes both psoas and piriformis exercises is highly recommended for optimal results.
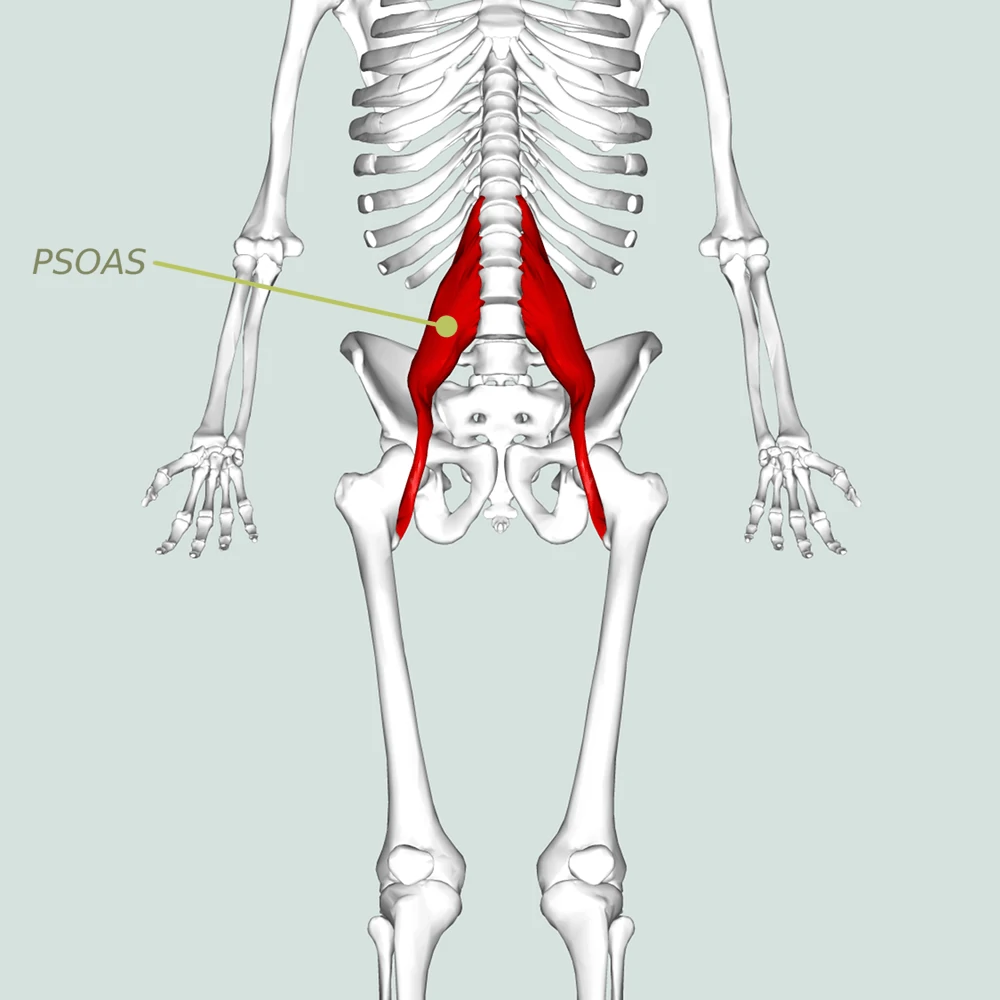
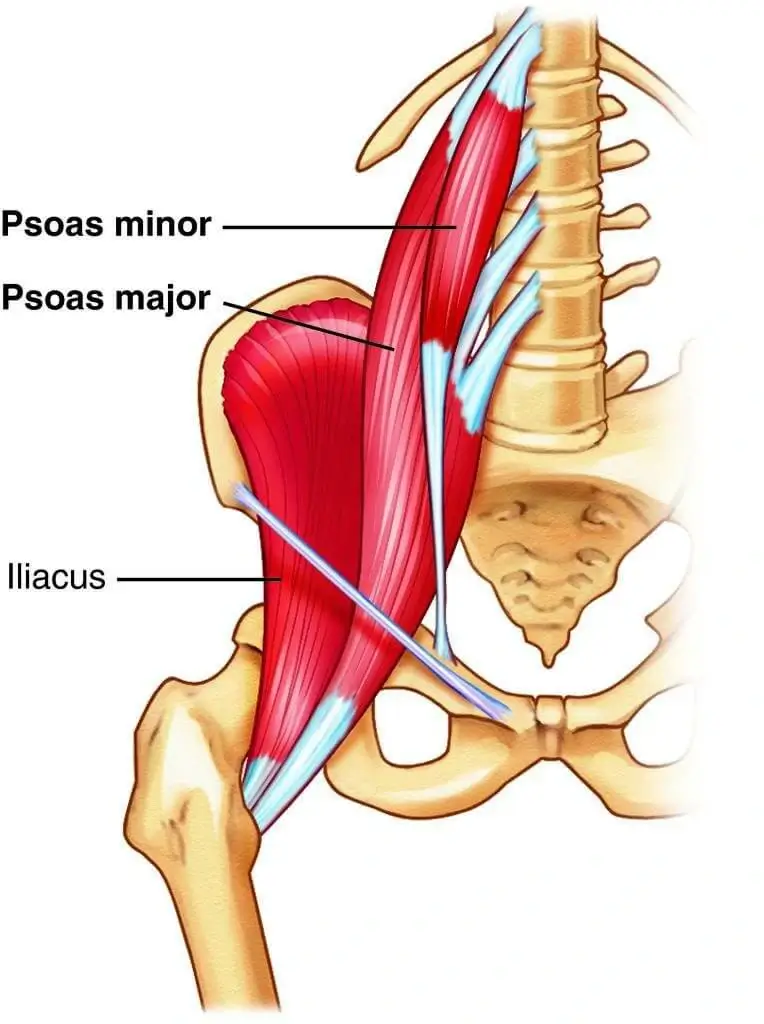
The Psoas: Location and Function of the Mighty Muscle
The psoas is a vital muscle that is responsible for connecting the legs to the back. It is made up of two muscles: the psoas major and the iliacus. The psoas major originates in the lower back and runs through the pelvis where it joins the iliacus. The merged muscles then attach to the inner top of the femur at the lesser trochanter.
While posture is one of its important roles, the psoas’ main job is to flex the hip by contracting to move the thighs towards the spine. It also helps to flex the spine, contracting to move the spine towards the thighs. In yoga, the psoas is engaged when performing poses such as boat pose, chair pose, and when lifting a leg up while standing or supine.
The gluteals serve as antagonists to the psoas and when they contract, as in bridge pose and locust pose, the psoas lengthens. The importance of the psoas extends beyond yoga and is crucial in movements such as walking and running, as it contracts to bring the front leg forward and lengthens to extend the back leg.
The psoas is a powerful muscle that not only supports proper posture but also plays a key role in many movements. Understanding its function and incorporating exercises to strengthen and stretch it can help relieve pain and improve overall mobility.
Causes of Tight Psoas: Understanding How It Happens
The psoas muscle can become tight when we spend extended periods sitting and inactive, causing it to forget how to lengthen when we stand up. Overuse in certain physical activities such as dancing and sports that involve the legs can also contribute to psoas tightness. Yoga practices that focus on movements or poses that exclusively contract the psoas, without counterbalancing them with poses that stretch the muscle, may also contribute to tightness. Medical professionals have also noted a potential connection between stress or fear and psoas tightness.
A tight psoas may “pull” the lower back forward into hyperlordosis, leading to soreness in the waist or lower back, pain in the front of the hips, a snapping sound, or even leg length discrepancies. It can limit hip extension, affecting performance in activities that involve walking and running and potentially cause sacroiliac joint dysfunction. Tight psoas can also decrease respiratory function, and a release in the muscle may lead to fuller, deeper breaths.
This sequence aims to release psoas tightness through a technique called PNF or pre-contraction stretching, where the target muscle is contracted and then relaxed before stretching. It can also stretch the quadriceps if they are tight as well. However, if the psoas is overstretched and weak due to a posterior pelvic tilt, it may benefit more from strengthening exercises such as pelvic tilts.
The Piriformis: Location and Function of the Mighty Muscle
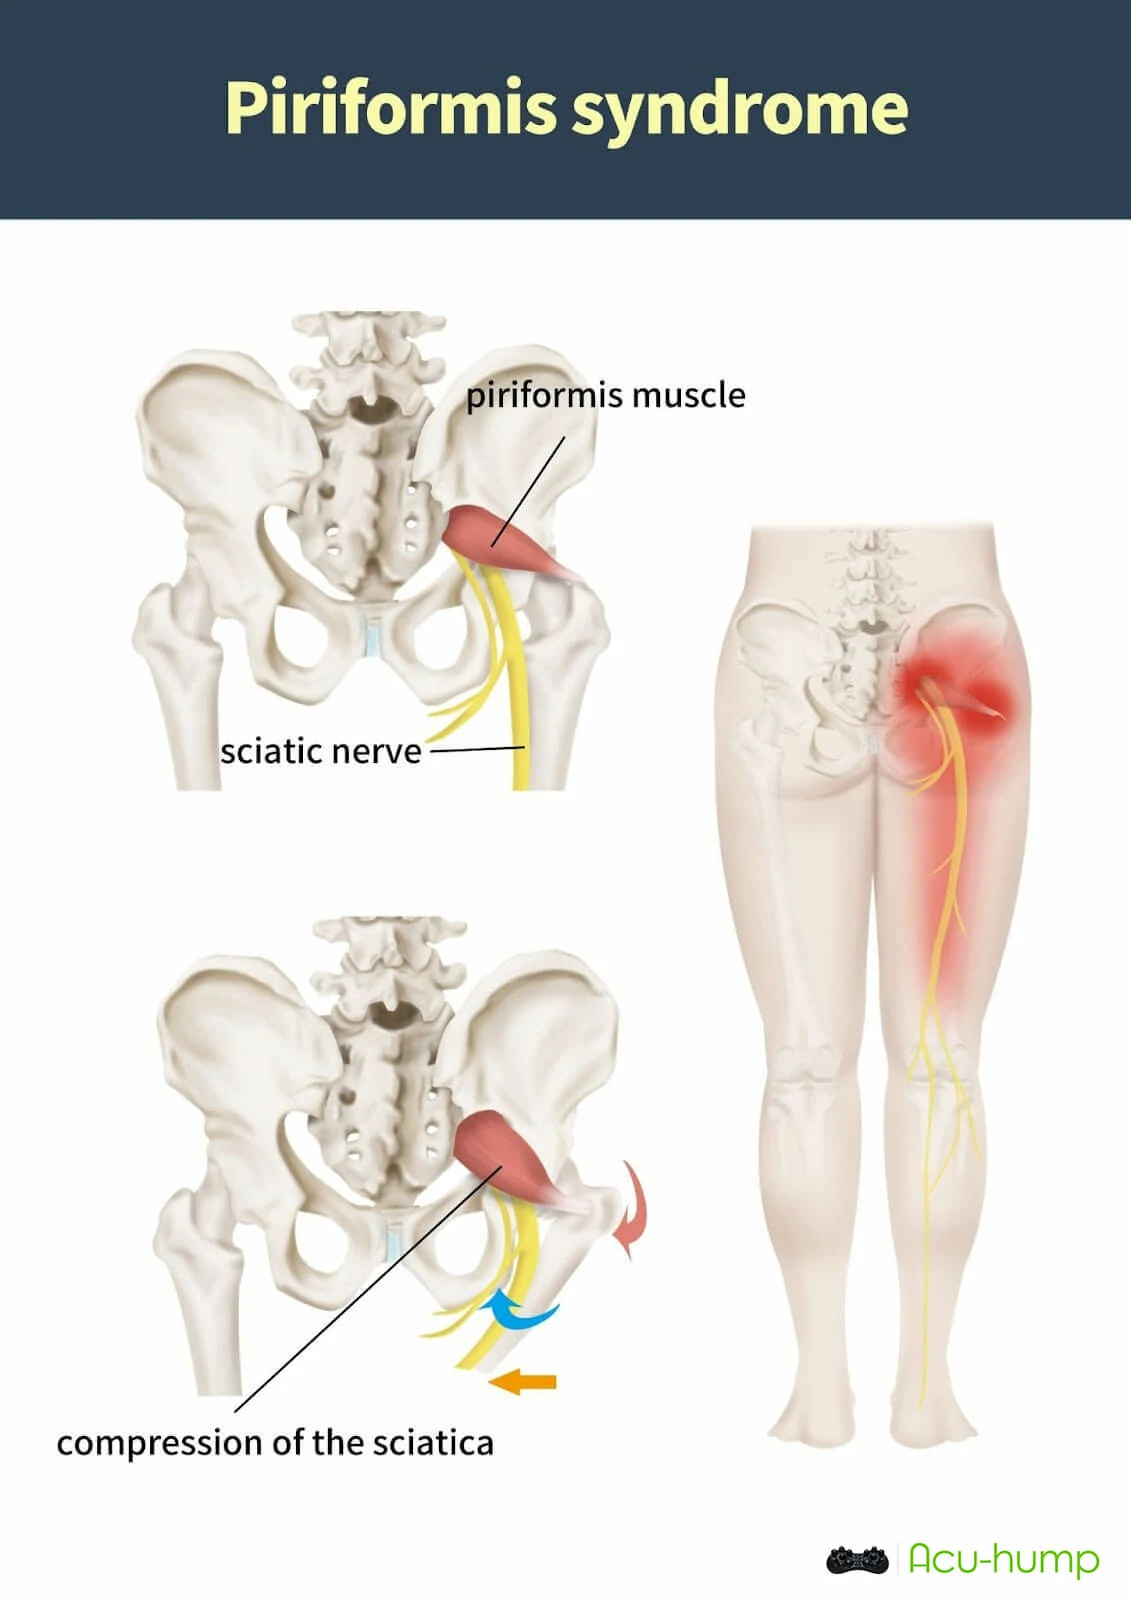
The piriformis muscle is a small but mighty muscle that is located in the gluteal region of the body. It is a flat, pear-shaped muscle that runs from the sacrum, which is the triangular bone at the base of the spine, to the upper part of the femur or thigh bone.
While the piriformis muscle’s primary function is to help rotate the hip, it also helps to stabilize the pelvis and assist in walking and running. Additionally, the piriformis muscle helps to support the overall health of the hip joint and spine.
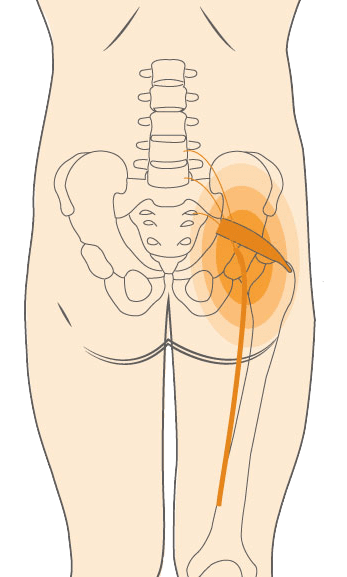
When the piriformis muscle becomes tight or inflamed, it can cause pain and discomfort in the hip and lower back region. The sciatic nerve also runs underneath or through the piriformis muscle. When the muscle tightens, it can irritate the sciatic nerve, leading to a condition called piriformis syndrome.
Piriformis syndrome is a common condition that affects many people. It can present as pain, numbness, or tingling in the hip, thigh, or leg. It can also cause difficulty sitting or standing for long periods of time.
Fortunately, there are exercises and stretches that can help alleviate the discomfort associated with piriformis syndrome. Yoga poses like pigeon pose, seated figure four pose, and spinal twists are all excellent for stretching and releasing tension in the piriformis muscle.
Strengthening exercises like squats, lunges, and side-lying leg lifts can also help improve the function of the piriformis muscle. By incorporating a combination of stretching and strengthening exercises into your daily routine, you can help alleviate the pain and discomfort associated with piriformis syndrome.
Piriformis exercises include clamshells, figure-four stretches, and standing gluteal contractions. These exercises help to strengthen the piriformis muscles, which can reduce the risk of hip and lower back pain. They also contribute to better hip external rotation, which is critical for running, walking, and other activities that require a full range of motion.
Causes of Tight Piriformis: Understanding How It Happens
There are numerous causes of a tight piriformis muscle. One of the most common causes is prolonged sitting. If you have a desk job or spend a lot of time sitting, your piriformis muscle can become short and inactive, leading to tightness and discomfort. Additionally, participating in activities that require repetitive or prolonged movements, such as running, bicycling, or rowing, can also contribute to piriformis tightness.
In some cases, muscle imbalances in the body can also lead to a tight piriformis muscle. For example, if you have weak gluteal muscles, your piriformis muscle may become overactive and tight. Tightness in other nearby muscles, such as the hip flexors, can also put strain on the piriformis muscle and cause tension.
Certain medical conditions can also cause piriformis tightness. Sciatica is one such condition caused by a pinched or irritated sciatic nerve that runs under or through the piriformis muscle. This can cause pain and discomfort in the gluteal region and legs and lead to piriformis syndrome. Other medical conditions, including spinal disorders, scoliosis, and pelvic tilt, can also contribute to piriformis muscle tightness.
Release Sequence
You will need a Acu-hump. To massage the psoas, the Acu-hump can be helpful.
Acu-hump: 30-day return policy. No risk for you.
Diaphragmatic Breathing in
To start your practice, it’s recommended to bring awareness to your breath first. This helps you maintain a diaphragmatic breath throughout your practice.
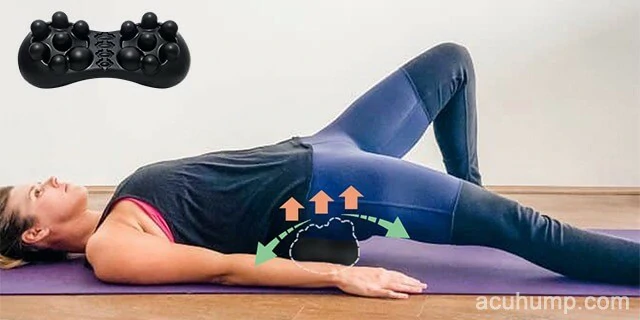
To do this, lie on your back with an Acu-hump beneath your lower back and your palms on the mat. As you breathe, focus on allowing the entire circumference of your waist (not just your belly) to expand and contract. Try to expand your belly, lower back, and the sides of your waist with each inhale, then draw them in with each exhale.
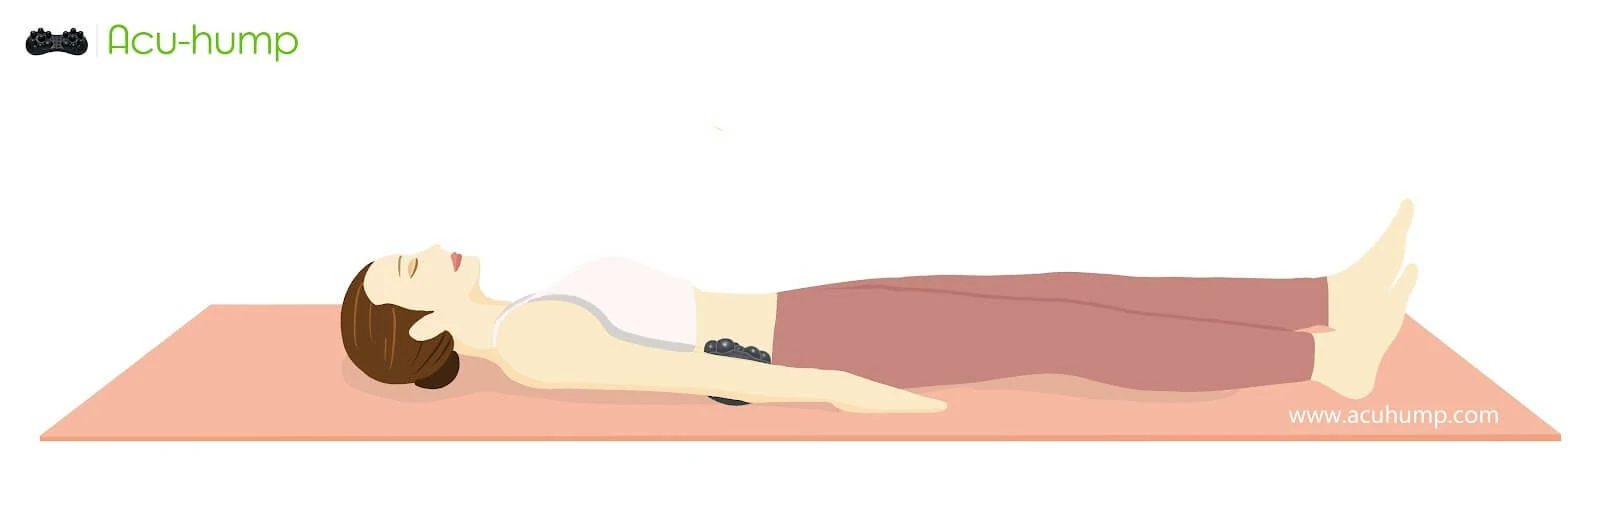
Visualize the structures inside your body, including the diaphragm and iliopsoas, which are closely connected. The lower part of the diaphragm is attached to the fascia covering the top of the psoas major, with tendons connecting the diaphragm to the lumbar spine. Imagine your diaphragm massaging tension from your iliopsoas on your inhale and releasing pressure on your exhale.
After taking a minute or two to focus on this breathing technique, you can begin your active yoga practice while continuing to maintain expansive, diaphragmatic breaths.
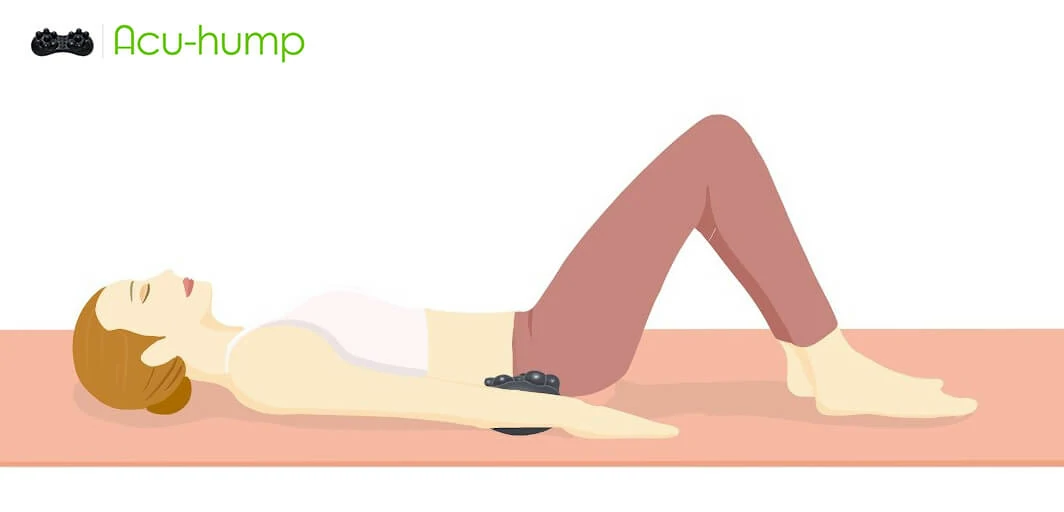
Supported Bridge Variations
The following supported bridge variations aim to release tension in the iliopsoas muscle by extending one or both hips.
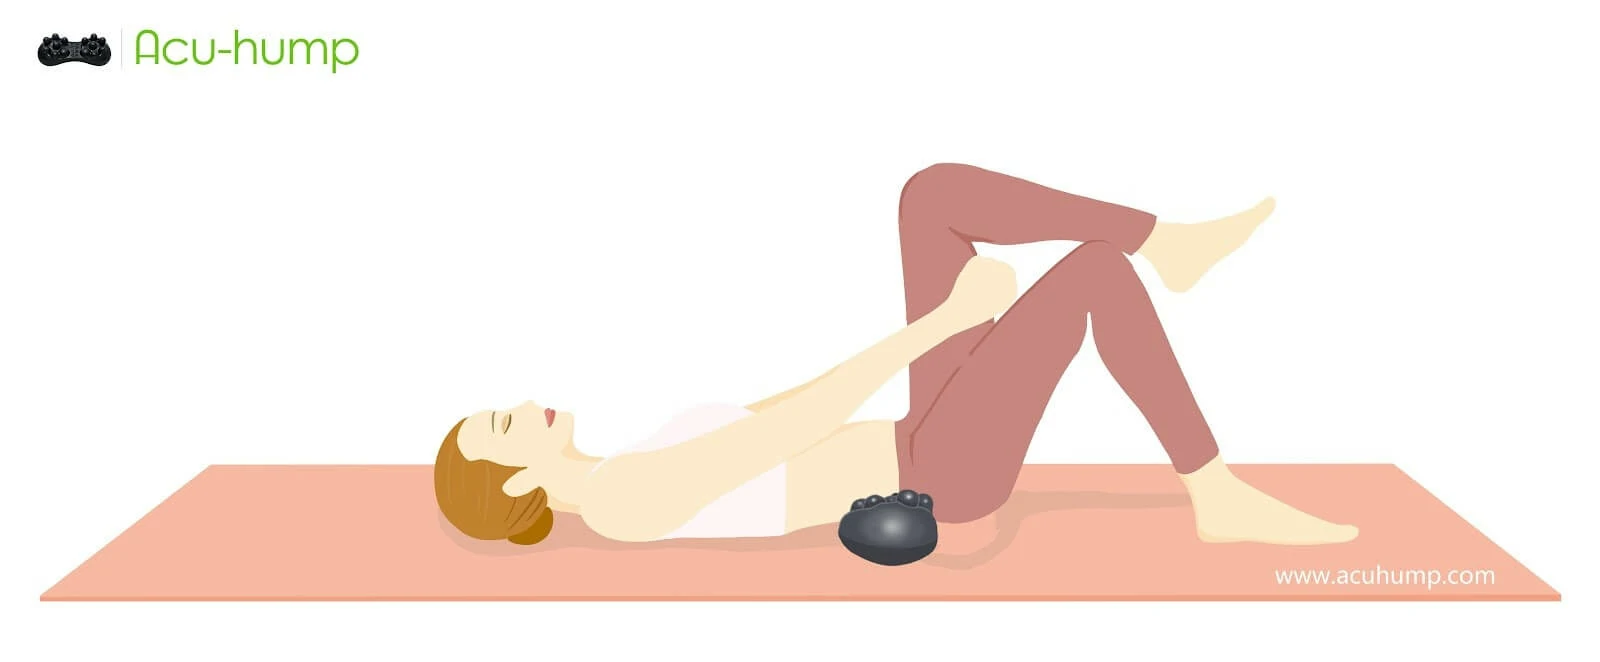
To begin, lie on your back with both knees bent and feet a few inches away from your sitting bones. Lift your hips into a low bridge and slide the Acu-hump horizontally, on its medium setting, under your sacrum.
With your left foot on the floor, draw your right knee into your chest. Press your right knee away from you with one or both hands on top of the right thigh for three breaths.
Slowly lengthen your right leg out in front of you, pressing down on your thigh with your right hand. Allow your right thigh to drop toward the ground while your leg relaxes.
Bend your right knee, place your foot back on the mat, and switch to the opposite side.
After completing the second side, lengthen both legs together, keeping them slightly apart but still parallel. Place your hands at the top of your thighs and press down gently, being careful not to overarch your lower back. Breathe deeply and hold for several breaths or up to a few minutes if comfortable.
Remember to maintain a diaphragmatic breath throughout your practice and avoid any discomfort or pain.
Massage Piriformis & Stretch Psoas
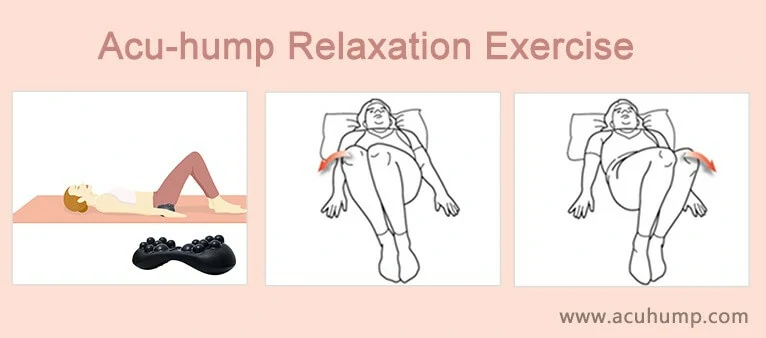
Lie down on a firm surface, such as the floor. Avoid using a soft bed.
Place the Acu-hump under your lower body.
Bring your legs together and bend your knees.
Swing your legs towards the ground on the right-hand side simultaneously, trying to get as close to the ground as possible. Hold the position at the limit for 15 seconds, and then turn in the opposite direction.
Repeat this sequence for 2 minutes per round.
You can perform this exercise twice a day, spending 2 minutes on each section from the lumbar to the hip area. This exercise aims to target the lower back, hip, and buttock muscles.
As you use the Acu-hump, you may experience some discomfort or pain as it presses against tight muscles, breaking up knots around acupressure points. However, this temporary pain indicates that the Acu-hump is working effectively.
Release Piriformis
Lie down on a hard surface, avoiding soft beds.
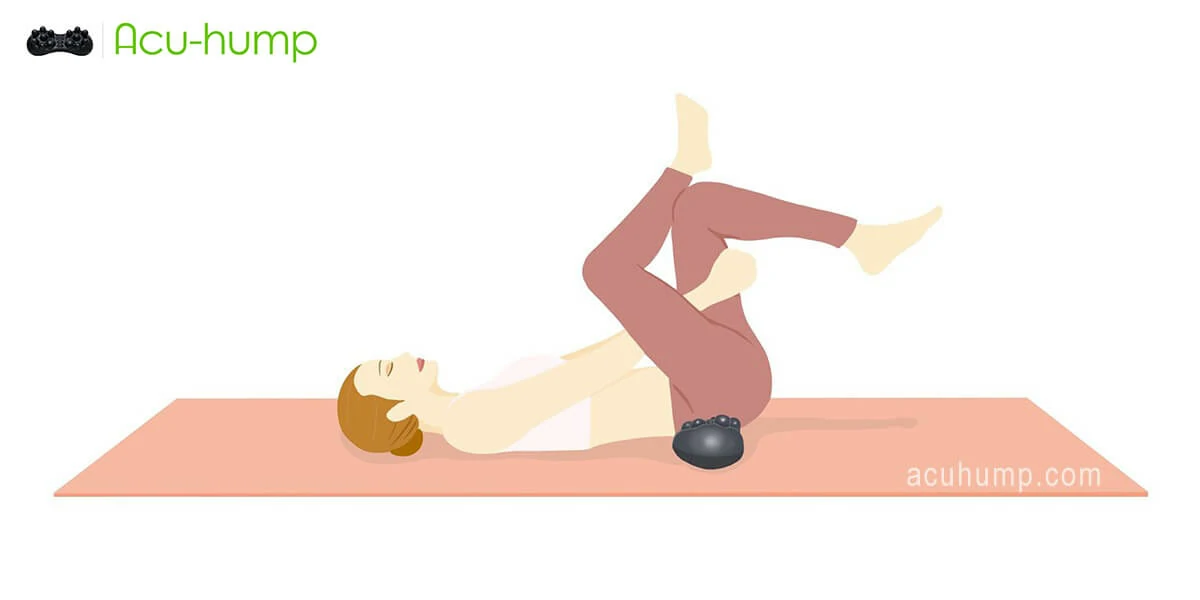
Place the Acu-hump under your buttock, ensuring that the high side of the Acu-hump is close to your feet.
Cross your legs as shown in the picture, keeping your butt on the Acu-hump throughout the entire exercise. Hold this position for 30 seconds. If you’re over 40 years old, it’s recommended to hold the position for 60 seconds.
Switch legs and repeat step 3. Do steps 3 and 4 for 3-4 rounds.
You can do this exercise twice a day, with each round lasting 5 minutes. This method aims to help with piriformis syndrome or sciatica caused by piriformis compression.
As you use the Acu-hump to massage out tight muscles, you may experience some discomfort or pain as it breaks up knots. This pain is a normal part of the process and indicates that the Acu-hump is working effectively.
In conclusion, psoas and piriformis muscles are interconnected components of the hip joint that can have a profound impact on your overall health. Incorporating both psoas and piriformis exercises into your workout routine can improve your body’s stability, flexibility, and mobility, leading to better movement efficiency, posture, and reduction of risk of injury. So, don’t forget to include psoas and piriformis exercises in your next workout to maintain a healthy hip joint.

Acu-hump: 30-day return policy.
You have no risk.