Piriformis syndrome is a condition characterized by the compression of the sciatic nerve by the piriformis muscle in the hip. This can lead to discomfort and pain in the foot. While there are various treatments available for this condition, yoga has emerged as a potentially effective approach. Yoga combines physical postures with deep breathing and meditation to promote physical and mental wellness. In this article, we explore how yoga can be used to relieve symptoms and prevent piriformis syndrome.
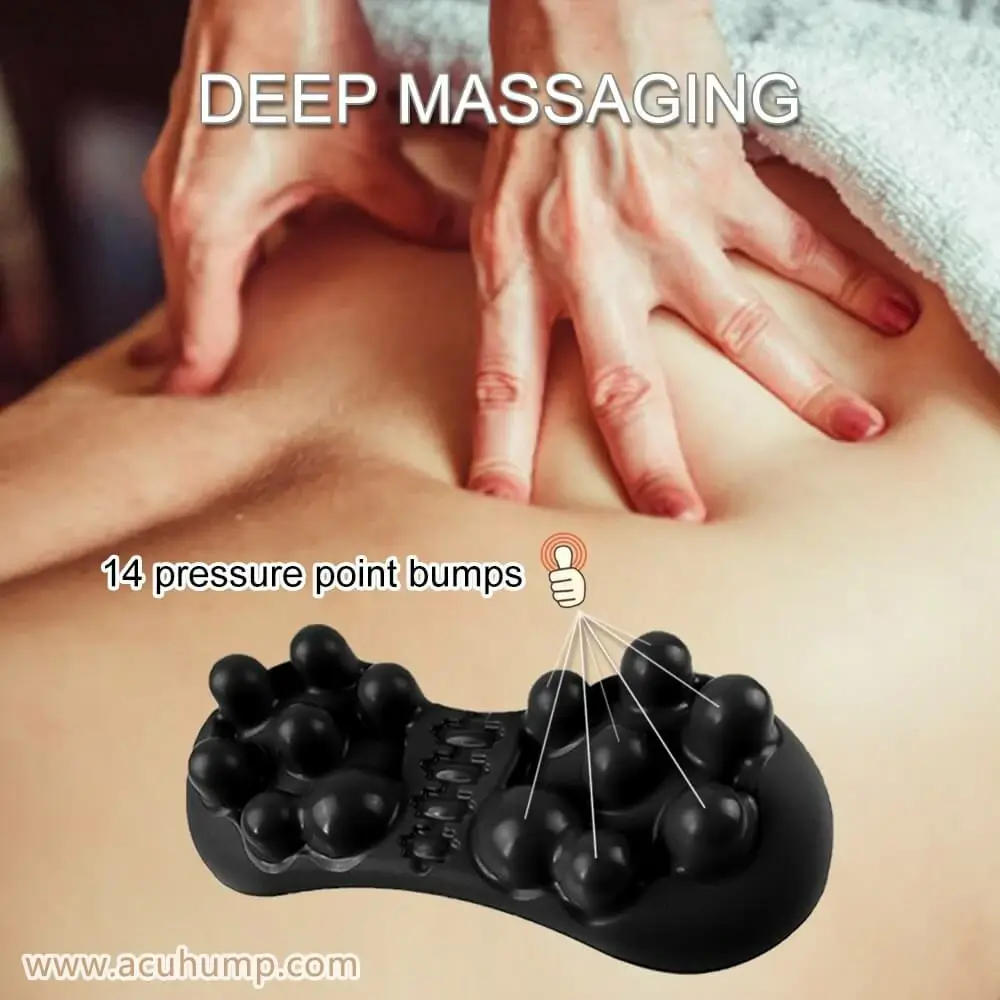
Acu-hump® Relieve Piriformis Pain
Benefits of Yoga for Piriformis Syndrome
Yoga can improve flexibility and strengthen the muscles, reducing tension in the piriformis muscle and preventing nerve compression. Certain poses can be targeted to stretch and strengthen the hip and leg muscles, which can alleviate the root cause of piriformis syndrome. Furthermore, yoga can reduce stress and tension that may contribute to muscle tightness through deep breathing, mindfulness, and relaxation techniques.
In addition to improving flexibility and muscle strength, yoga can also provide mental and emotional benefits for individuals with piriformis syndrome. The combination of physical postures and deep breathing can help to calm the mind and reduce stress, which may contribute to muscle tension and nerve compression. Yoga promotes a mind-body connection that encourages individuals to become more aware of their thoughts, emotions, and physical sensations, allowing them to better understand and manage their symptoms. The relaxation techniques used in yoga, such as meditation and visualization, can also be helpful in reducing anxiety, improving sleep, and promoting overall well-being. By incorporating yoga into their daily routine, individuals can not only address the physical tight piriformis muscle symptoms but also boost their mental and emotional well-being.
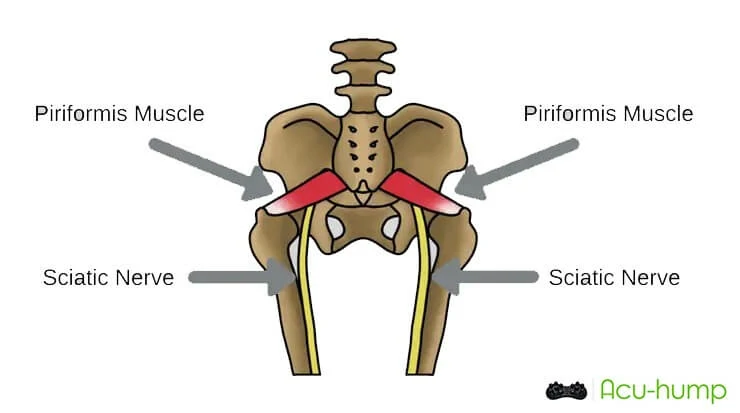
When this muscle becomes tight or inflamed, it can compress or irritate the sciatic nerve that runs beneath it, resulting in a condition known as piriformis syndrome. There are several reasons why piriformis syndrome may occur, such as overuse of the muscle, traumatic injury, or even sitting for prolonged periods. Regardless of the cause, the resulting discomfort and pain can be managed through targeted stretches and exercises that target the piriformis muscle.
Yoga Poses for Alleviating Piriformis Syndrome
Several yoga poses can be effective in easing piriformis syndrome. It is essential to practice these poses with proper alignment and modifications to prevent further injury or strain. In addition, incorporating deep breathing and mindfulness techniques can enhance the benefits of these poses.
From lower back to hips.
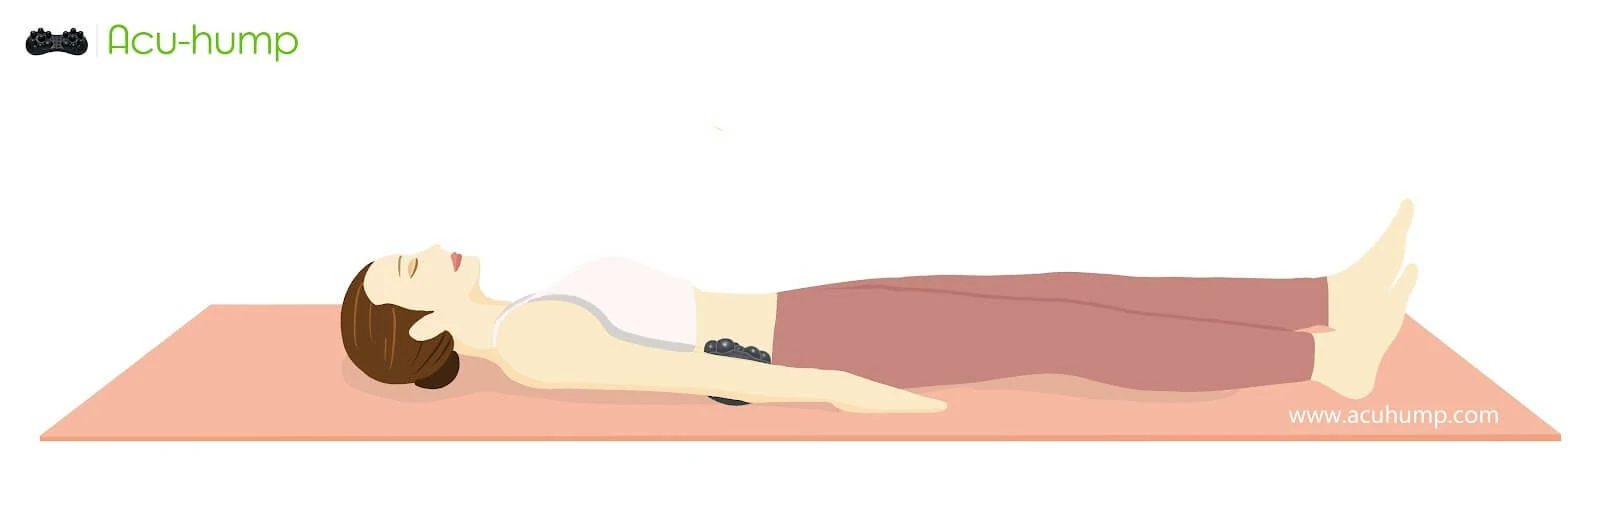
1# Step: Lower Back
The Acu-hump is an innovative tool that targets the QL muscles in the lower back, promoting muscle relaxation through deep tissue massage. By applying pressure to these tight and knotted muscles, the Acu-hump helps to release tension and improve blood circulation, providing pain relief and aiding in muscle recovery.
Acu-hump: 30-day return policy. No risk for you.
To use the Acu-hump, place it under your lower back with the taller end near your head, aligned with the QL muscles. Lie on top of the Acu-hump with your legs straight and allow the tool to work its way into your tight muscle tissue. As the Acu-hump applies pressure, you may feel some discomfort or intensity, particularly if your muscles are tightly bound. This sensation is a sign that the tool is successfully targeting and releasing tension in these areas.
Consistent use of the Acu-hump can improve the flexibility and function of the QL muscles, easing lower back pain and promoting overall comfort and well-being. It is advisable to listen to your body and adjust the intensity and duration of use according to your comfort level. In the beginning, it’s best to start with shorter durations and gradually increase the time as your body gets accustomed to the pressure.
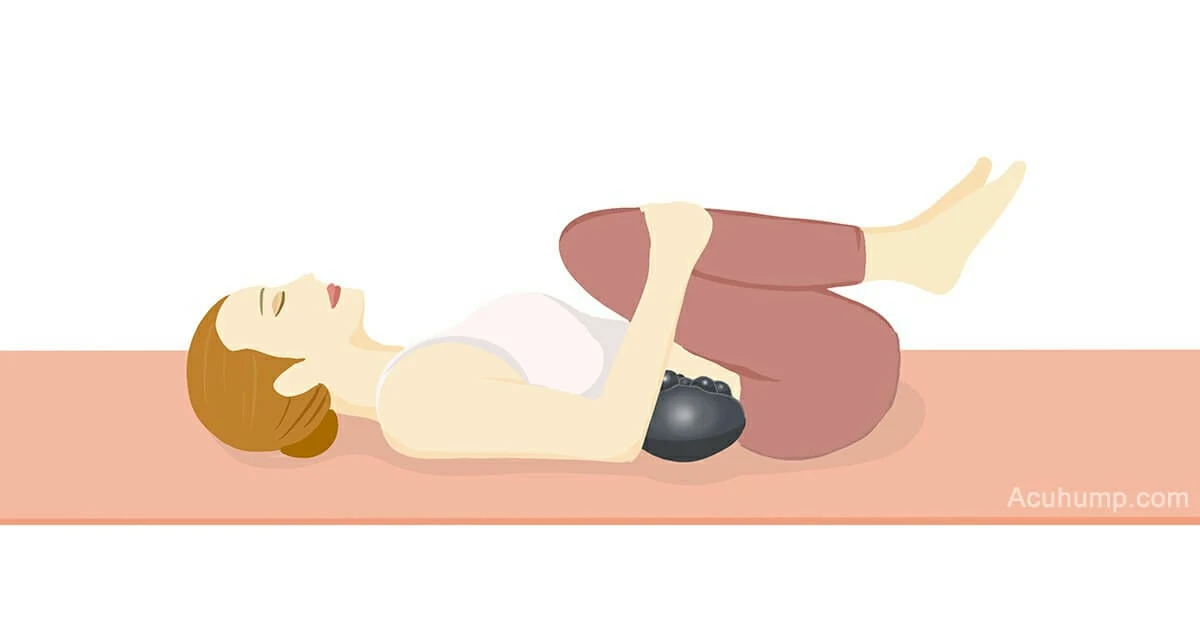
2# Step: Lumber Spinal
The Acu-hump is a versatile tool effectively used to relieve various kinds of lower back pain, including bulging disc, herniated disc, sciatica pain, and Cauda Equina Syndrome. By following these easy steps, you can efficiently use the Acu-hump to ease your pain and promote muscle relaxation:
Acu-hump® Relieve Piriformis Pain
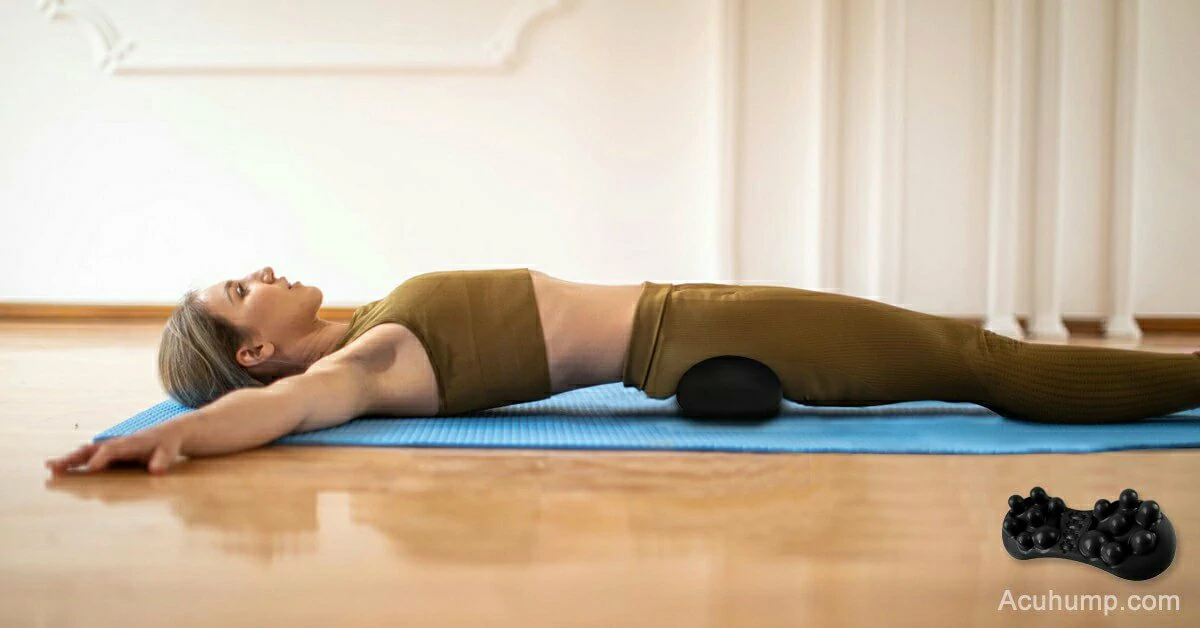
Step 1: Find a sturdy and firm surface like the floor to lie flat on. This helps to apply enough pressure to engage the muscles effectively.
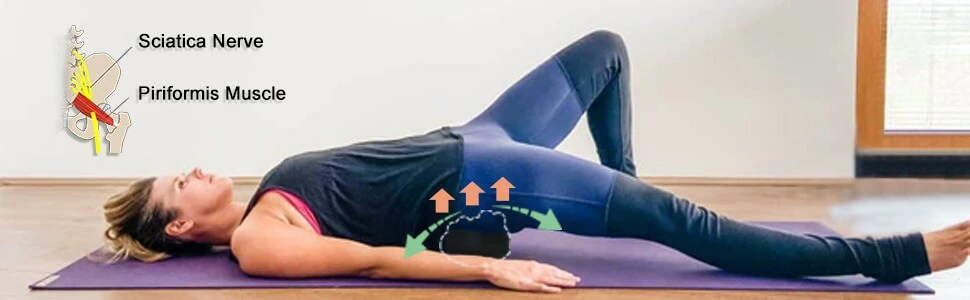
Step 2: Position the Acu-hump massage stretcher beneath your spine, making sure that the higher side is located near your head and aligned with the affected area. Proper alignment is crucial for targeting the specific area, leading to pain or discomfort.
Step 3: Hold your knees to your chest in a hugging motion and maintain this position for around 30 seconds. This gentle stretching motion helps to relieve tension in the muscles of your lower back and reduce pain.
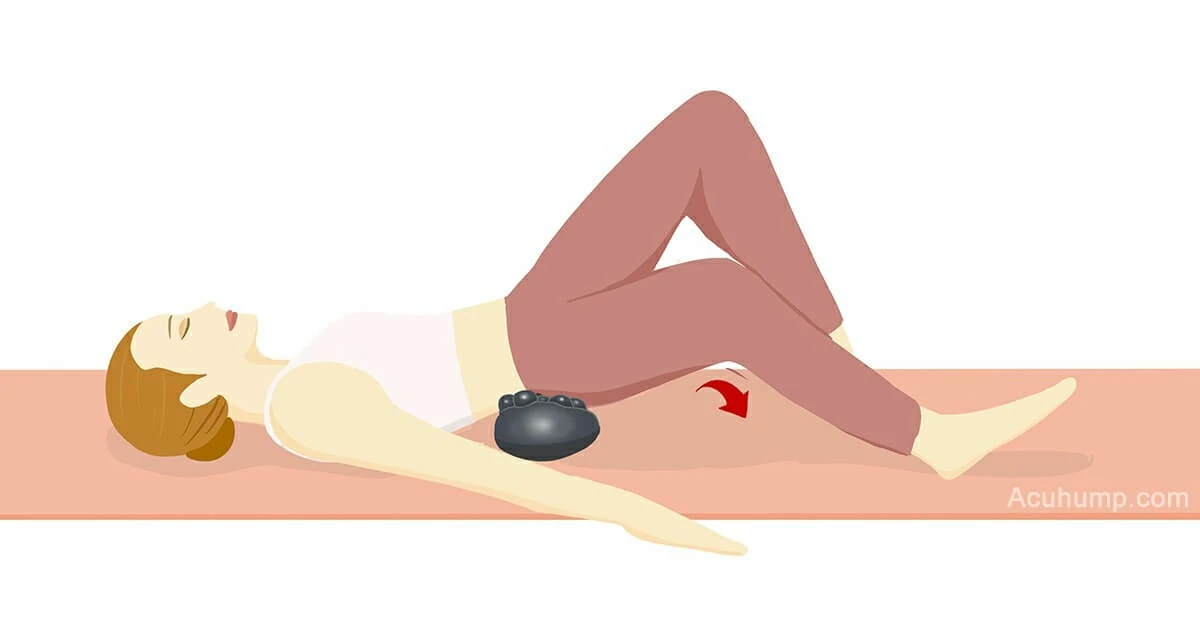
Step 4: Release your hands and straighten your legs while still holding the position on the Acu-hump. Maintain this new position for an additional 30 seconds. By doing so, you’ll continue to stretch the muscles in your lower back, which helps to improve circulation and bring relief.
Step 5: Repeat steps 3 and 4 as needed to achieve optimal pain relief and relaxation. Consistent and regular use of the Acu-hump can substantially improve your lower back condition and enhance your overall well-being.
Acu-hump: 30-day return policy. No risk for you.
3# Step: SI Joint
Incorporating the Acu-hump into your routine using these steps can offer significant relief for Sacroiliac Joint Dysfunction and Pubic Symphysis issues:
Step 1: Find a sturdy surface, like the ground, to lay on. It is essential to apply enough pressure to target the affected area effectively.
Step 2: Place the Acu-hump massage stretcher beneath your Sacroiliac (SI) joints. Ensure that the higher side is near your head and aligned with the affected area to target the specific location causing pain or discomfort.
Step 3: Bend your legs and maintain a slightly wider-than-shoulder-width distance between your knees.
Step 4: Keeping your left leg steady, gradually swing your right leg towards the ground. Hold this position for approximately 15 seconds before drawing back your right leg.
Step 5: Repeat Step 4, but this time with your left leg. Every time you swing your leg towards the ground, keep that position for about 15 seconds.
Incorporating the Acu-hump into your routine using these steps can provide significant relief for Sacroiliac Joint Dysfunction and Pubic Symphysis problems.
Acu-hump: Full refund policy. No risk for you.
4# Step: Psoas & Hip Flexor
Begin by lying on your back with knees bent and feet a few inches away from your buttocks. Lift your hips to create a low bridge shape, then place the Acu-hump horizontally on its medium setting under your sacrum, the triangular bone at the base of your spine.
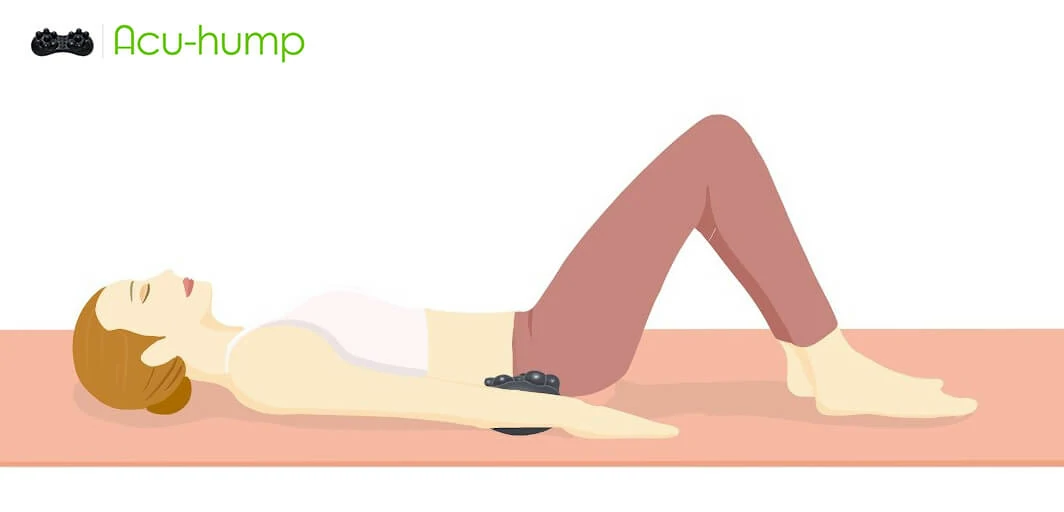
With your left foot firmly planted on the floor, bring your right knee towards your chest. Take three deep breaths, and gently push your right knee away from your body while placing one or both hands on your right thigh to stretch. Then, slowly extend your right leg straight out in front of you while lightly pressing down on the thigh with your right hand and allow your right thigh to lower toward the ground.
Bend your right knee and place your foot back on the mat. Then, switch to the opposite side and repeat the entire process.
After completing both sides, lengthen both legs together, keeping them slightly apart but still parallel. Place your hands gently at the top of your thighs and press down. Be cautious not to overextend your lower back. Take deep breaths, hold this position for several breaths or even a few minutes if you feel comfortable.
By following these steps, you can effectively use the Acu-hump to stretch and alleviate tension in your lower back.
Acu-hump® Release the Back & Butt
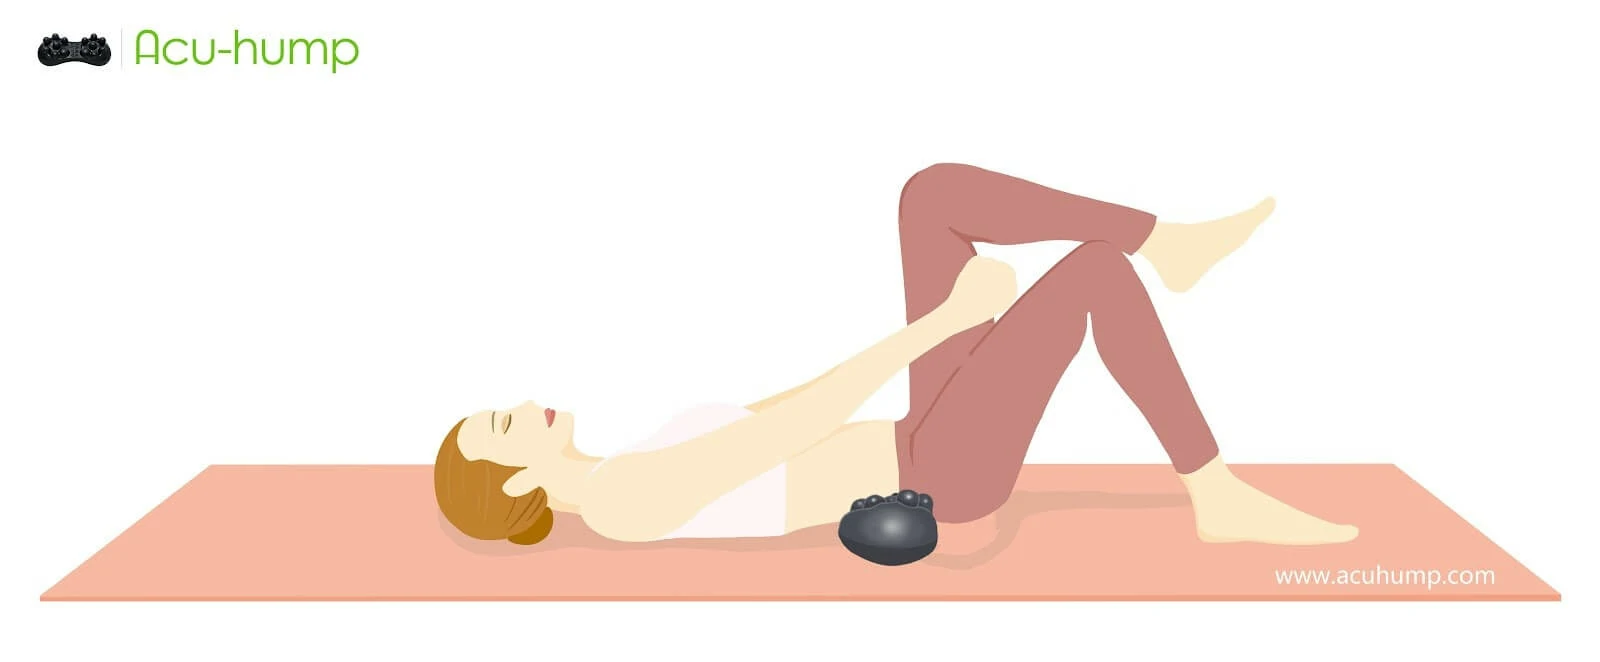
5# Step: Figure 4 Piriformis Stretch
The Acu-hump is a beneficial tool for enhancing the figure 4 stretch, which targets the piriformis muscles. To perform this stretch correctly with the Acu-hump, follow these steps:
Begin by lying on your back with your knees bent and feet on the ground.
Place the Acu-hump under your sacrum, making sure the high side of the massage stretcher faces your head. This aligns the Acu-hump with the targeted area and maximizes the stretch’s effectiveness.
Cross your right ankle over your left knee, forming a figure 4 shape. This position provides a deeper stretch and alleviates pain and tightness in the hips.
Gently pull your left thigh towards your chest using your hands, maintaining a bent right knee. This action further stretches the muscles in your hip and lower back, relieves pain, and improves flexibility. Hold this position for about 30 seconds, allowing the muscles to lengthen and relax. Take deep breaths and focus on releasing any tension you may be holding.
Release the stretch after the allotted time and switch sides. Incorporating the Acu-hump into the figure 4 stretch routine offers improved alignment and reduces the risk of injury, promoting healthier hips and enhancing mobility.
By following these steps and utilizing the Acu-hump correctly, you can maximize the figure 4 stretch’s benefits and experience more significant comfort and flexibility in your hips and lower back.
Acu-hump®
Release Butt & Lower Back
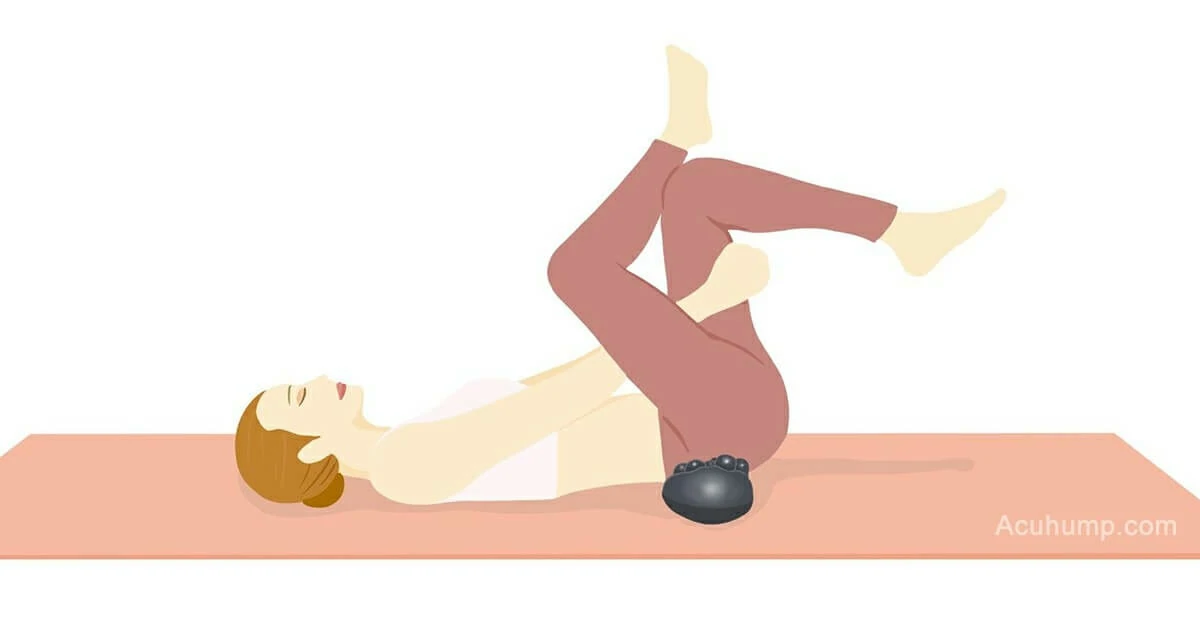
6# Step: Hamstrings
The piriformis muscle is located in the buttocks and is essential for leg movement. To relieve pressure and enhance mobility in this area, regular leg root stretching exercises are recommended to be incorporated into your daily routine.

These exercises aim to relax the muscles from the buttocks to the legs, lowering tension on the sciatic nerve and easing symptoms of piriformis syndrome or sciatica. By performing leg root stretching exercises consistently, you can enhance flexibility and alleviate discomfort in your lower back and legs. Consistent practice can also prevent the onset or reoccurrence of sciatic nerve pain.
Acu-hump: 30-day return policy. No risk for you.
Precautions and Tips for Practicing Yoga with Piriformis Syndrome
Individuals with piriformis syndrome should consult with their doctor before starting a new yoga practice. They should also avoid certain poses that may exacerbate symptoms, such as twisting or forward folds. Warming up and cooling down before and after a yoga practice helps to prevent injury and support muscle recovery. Practicing with a qualified yoga instructor and listening to one’s body are also crucial in ensuring safety and effectiveness.
What is Acu-hump:
Acu-hump was used in the above yoga exercises.
Acu-hump is a cutting-edge solution designed to help those suffering from piriformis syndrome by providing relief from pain and muscle tension. Its exceptional characteristics include an ergonomic design, acupressure points, and adjustable intensity levels, making it useful for targeting the piriformis muscle and reducing discomfort.
Acu-hump® Release Piriformis Muscles
The advantages of Acu-hump for dealing with piriformis syndrome are numerous. Acu-hump specifically targets the piriformis muscle, releasing pressure to reduce stiffness and inflammation. Utilizing Acu-hump can help improve flexibility, promote blood circulation, and provide overall relief to individuals suffering from piriformis syndrome.
Acu-hump® Release Piriformis Muscles
How to Use Acu-hump:
Using Acu-hump is straightforward, and it can be done within the comfort of one’s own home. It should be placed on a flat surface, and the affected buttock must be rested on the hump. Then, gently apply pressure and gradually increase the intensity until you find a comfortable level. It is recommended to stay in this position for at least a few minutes. It is crucial to listen to your body and adjust the force accordingly to avoid any injuries or discomfort.
Acu-hump: 30-day return policy. No risk for you.
Yoga has emerged as a holistic and mindful approach to cure piriformis syndrome. The combination of physical postures, deep breathing, and meditation can improve flexibility, strengthen the muscles, and reduce stress. Furthermore, specific yoga poses can be targeted to stretch and strengthen the hip and leg muscles, which can alleviate pain and discomfort associated with the condition. By incorporating yoga into their routine, individuals can prevent piriformis syndrome and manage symptoms in a natural and effective way.